What is MFA and why do I need it?
Multi-factor authentication (MFA) adds an extra layer of security to your Greenback Tax Companion account. Instead of just a password, you also verify your identity using the Salesforce Authenticator app on your phone. This protects your tax information from unauthorized access.
What do I need before I start?
Download the Salesforce Authenticator app on your phone before you begin. It is available free on the App Store (iOS) and Google Play (Android).
How do I enable MFA on my account?
1. Log in to your account and go to the left-side navigation panel. Scroll down to find the Enable MFA option.
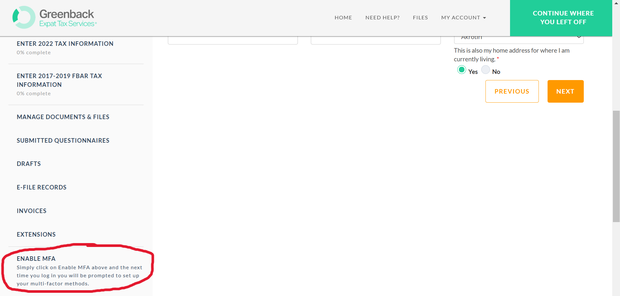
The Enable MFA link in the left navigation panel.
2. Click Enable MFA to begin setup.
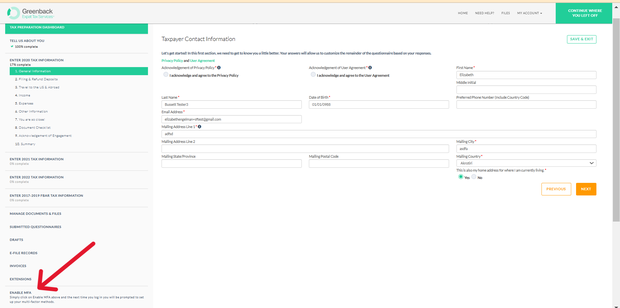
Click Enable MFA to begin.
3. Open the Salesforce Authenticator app on your phone and tap Add Account. The app displays a two-word phrase. Enter that phrase in the field on your screen, then tap Connect.
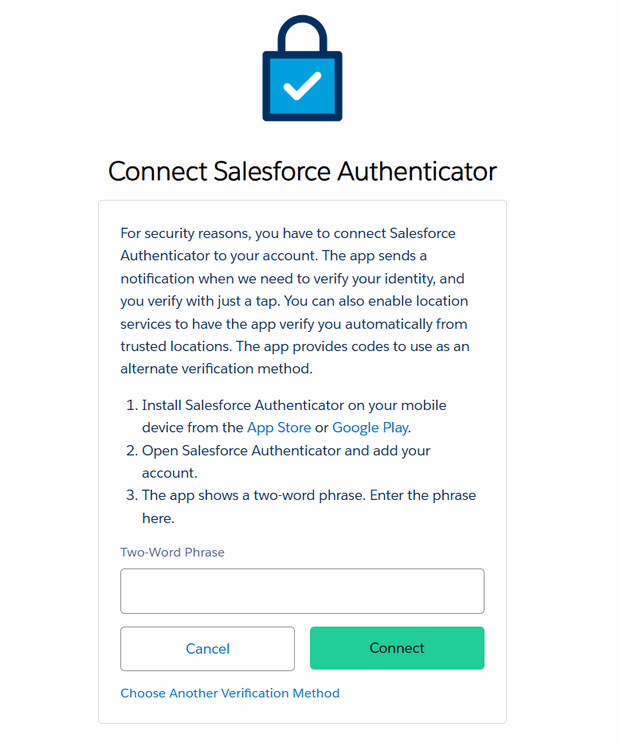
Enter the two-word phrase from the Salesforce Authenticator app.
4. Approve the connection request on your phone when prompted.
How do I know MFA was set up successfully?
You will receive a confirmation email from Greenback Expat Tax Services confirming a new verification method was added to your account.
How do I disable MFA if needed?
Go back to the same area (left navigation > Enable MFA) and click the Disable MFA link.